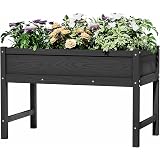


BIVODA HDPE Raised Garden Bed with Legs, Outdoor All-Weather Elevated Planter Box Stand for Seeds, Herbs, Flowers, Vegetables (Black)
$139.99 (as of 14:44 GMT -05:00 - More infoProduct prices and availability are accurate as of the date/time indicated and are subject to change. Any price and availability information displayed on [relevant Amazon Site(s), as applicable] at the time of purchase will apply to the purchase of this product.)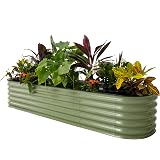


Vego garden Raised Garden Bed Kits, 17" Tall 9 in 1 8ft X 2ft Metal Raised Planter Bed for Vegetables Flowers Ground Planter Box-Olive Green
$169.95 (as of 13:56 GMT -05:00 - More infoProduct prices and availability are accurate as of the date/time indicated and are subject to change. Any price and availability information displayed on [relevant Amazon Site(s), as applicable] at the time of purchase will apply to the purchase of this product.)Hey there! If you’re anything like me, you miss the fresh greens in your meals during the colder months. But guess what? You don’t have to settle for bland, store-bought veggies. I’m here to share my personal experience on how I successfully grow fresh greens in winter. Let’s dive into the nitty-gritty of five major areas that’ll make your winter garden the envy of the neighborhood!
Choosing the Right Varieties
Understanding What Grows Well in Winter
When I first started my winter gardening journey, I learned quickly that not all greens thrive in the cold. Spinach, kale, and arugula are my go-to choices. They love the chill and actually taste sweeter after a frost. Who knew mother nature had a secret recipe for success?
It’s important to pick varieties that are specifically bred to withstand lower temperatures. Some of my favorite seed catalogs even highlight winter-hardy greens. I’d recommend checking those out; it’s like having your own winter gardening cheat sheet!
Researching which varieties are best for your climate is key. Local gardening groups or forums can be great resources. You might find hidden gems that are super easy to grow in your area!
Seed Selection Tips
Choosing quality seeds is paramount. I always look for organic, non-GMO seeds for peace of mind. Plus, it makes me feel like I’m doing my part for the planet. When you pick the seeds, make sure they’re suited for the zone you live in. Some seeds are more adaptable than others, and knowing your zone can save you a lot of heartache.
Check the expiration dates on seed packets, too. Using fresh seeds will improve your germination rates significantly. Don’t fall into the trap of using last year’s seeds just because you’re eager to get started—I once learned that the hard way!
If you can’t find seeds locally, there are tons of reputable online stores that specialize in winter greens. Support small businesses when possible; it really helps the gardening community grow stronger.
Where to Source Your Seeds
Local garden centers are a fantastic place to start. The folks there often have first-hand experience and can give you advice. Plus, it feels good to support local businesses!
If you prefer online shopping like I do, look for specialty gardening websites. They usually have an impressive selection and sometimes provide free shipping with a minimum order.
Don’t forget about seed exchanges! These are wonderful community events where gardeners share their successes and swaps seeds. It’s an excellent way to discover new varieties without spending a dime!
Preparing Your Garden Space
Clearing and Cleaning the Area
Before winter sets in, it’s crucial to prep your garden. I always clear away the old debris, like dead plants and weeds, because they can harbor pests and diseases that will come back to haunt you next season. Believe me, I’ve learned this the hard way.
It’s also beneficial to rake the ground and turn the soil. Aerating it makes a world of difference! Your greens will thank you when they can put down strong roots in well-prepped dirt.
Sometimes I carry over compost from the fall harvest; it enriches the soil and gets my greens off to a flying start. Just ensure any compost you use is well-aged to avoid burning those tender seedlings.
Building Raised Beds or Cold Frames
Consider making raised beds or cold frames if you really want to control your growing environment. These elevated structures literally make gardening a breeze! I built my first one using reclaimed wood, and it turned out great.
Cold frames, on the other hand, are like mini-greenhouses. They trap heat and moisture, creating a cozy environment for your greens to grow. Just one sunny afternoon inside a cold frame can provide the warmth needed to jumpstart your planting.
Ultimately, having a designated space will keep your greens safe from harsh cold winds and frosts, which means healthier plants and better harvests for you!
Loosening Your Soil
Loosening the soil before planting is so important. I take my garden fork and give the soil a good turning over to break up any compacted areas. Healthy greens need room to grow deep roots, and breaking up hard soil can drastically improve your yields.
If you’re worried about soil quality, consider performing a soil test. It gives you insight into pH levels and nutrient deficiencies so you can address any issues before planting.
Don’t underestimate the power of adding organic matter. Mix in some compost or aged manure to enrich your soil. Your greens are going to thrive, and you can pat yourself on the back for giving them the best start!
Caring for Your Winter Greens
Watering Wisely
Watering in winter can be a bit tricky. While it’s colder, greens still need moisture to thrive. I check my soil regularly—just because it’s cold doesn’t mean the ground isn’t dry!
One tip I picked up and swear by is watering early in the day. It allows any excess moisture to evaporate and helps prevent frost from forming on the leaves overnight.
Get a free subscription to PREPARE – with more gardening and homesteading tips!
If you’re getting snow, don’t panic! Snow actually acts as an insulator. Just remember that if the ground is frozen solid, those greens need a little extra care until it thaws out.
Protecting Against Frost
To avoid frost damage, I use row covers or old blankets to shield my greens on particularly chilly nights. Just make sure to remove them during the day so your plants can bask in the sunlight. They’ll reward you for it!
In my experience, I’ve found that a little extra effort on cold nights can mean the difference between a sad wilted plant and a vibrant green that flourishes.
Windbreaks are also helpful! I’ve erected small fences or planted bushes around the edges of my garden to protect against harsh winds. Layering protection techniques is really the way to go!
Regular Maintenance Steps
Weeds and pests don’t just take a winter vacation. Regularly checking your greens helps keep everything in check. I allocate a little time each week to inspect my veggies. Pulling weeds early is essential in preventing them from stealing nutrients!
Embarking on pest control early is crucial too. I’ve found using a mixture of neem oil or insecticidal soap works wonders and is generally safe for my greens.
It’s all about balance! With good habits, your winter greens will be bountiful, and I promise you’ll be in for a delightful harvest come spring.
Harvesting and Enjoying Your Greens
When to Harvest
One of the most rewarding parts of gardening is harvest time! Typically, winter greens can be harvested when they reach about 4-6 inches tall. It’s like waiting for the perfect moment to pop a balloon—you’ll just know when the time is right!
I often start small and pick just a few leaves from each plant. It allows the plants to keep growing while ensuring I get fresh greens for my meals!
Don’t rush; patience is key. The longer you let them grow, the more nutritious and flavorful they become. Just remember their growth will slow significantly as temperatures drop, so it’s all about timing.
How to Store Fresh Greens
Once you’ve harvested, it’s crucial to store them properly to retain freshness. In my experience, I rinse them in cool water to get rid of any dirt, then pat them dry with a cloth. This step makes a world of difference!
I prefer to store my greens in a breathable container, such as a produce bag with holes or a lightly wrapped paper towel inside a plastic bag, in the fridge. This helps them stay crisp and delicious.
Eat them within the week for the best taste. It’s hard to resist when they’re so crispy and fresh—you’ll be devouring them in salads, stir-fries, and more!
Creative Ways to Use Your Greens
Cooking with your freshly harvested greens can be such fun! I love tossing them in smoothies for an extra nutrient boost or throwing them into soups to warm up on chilly days. Seriously, greens can elevate just about any dish!
If you’re feeling adventurous, try using them in omelets or quiches. The possibilities are endless, and trust me, your taste buds will be dancing with joy!
Don’t hesitate to share your greens with family and friends. There’s nothing like gifting some homegrown goodness. They’ll surely appreciate your efforts and may be inspired to start their own winter gardens!
Frequently Asked Questions
1. Can I really grow greens in winter?
Absolutely! Many greens thrive in colder weather, including spinach, kale, and arugula. With the right techniques such as choosing hardy varieties and using protection, you can enjoy fresh greens all winter long.
2. What type of soil do I need for winter greens?
A well-draining, nutrient-rich soil is ideal for winter greens. Loosening the soil and mixing in compost helps create a perfect growing environment, allowing your plants to thrive even in cold temperatures.
3. How do I protect my greens from frost?
Using row covers or blankets on particularly cold nights can help protect your greens from frost. Adding windbreaks like small fences or shrubs also provides extra shelter from harsh weather.
4. What’s the best way to water winter greens?
Water early in the day to ensure moisture isn’t sitting on the leaves overnight, which can cause frost damage. Regularly checking the soil moisture is vital, as winter soil can dry out despite the cold temperatures.
5. How should I eat and store my fresh greens?
Store your greens in breathable containers in the fridge for maximum freshness. They are delicious in salads, smoothies, and cooked dishes; get creative with your meals!
Get a free subscription to PREPARE – with more gardening and homesteading tips!
Related Content
- Eco-tip: Law requiring organic recycling kicks into gear; here’s what some sites do
- The Gritty Truth About Multi-Story Composting Toilets | Sierra Club
- City Of Napa: City Of Napa And Napa Recycling Awarded CRAA Leadership In Organics Recognition
- Eco-tip: Composting workshops return with Master Gardeners – Ventura County Star
- Burnsville To Add Organic Drop-Off Site