Nedenyou 2PCS 6x2x1FT Galvanized Raised Garden Bed,Planter Raised Beds-Metal Garden Box,Large Plant for Outdoor Planting, Vegetables Bed,Flower,herb-Sliver
$59.99 (as of 12:48 GMT -05:00 - More infoProduct prices and availability are accurate as of the date/time indicated and are subject to change. Any price and availability information displayed on [relevant Amazon Site(s), as applicable] at the time of purchase will apply to the purchase of this product.)


Best Choice Products 6x3x2ft Outdoor Metal Raised Garden Bed, Deep Root Box Planter for Vegetables, Flowers, Herbs, and Succulents w/ 269 Gallon Capacity - Gray
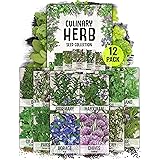
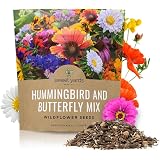
35% OffChoosing the Right Seeds
Understanding Your Climate Zone
When you’re just starting out with seed starting, the first step is to pick the right seeds based on your climate zone. Now you might be wondering, what’s a climate zone? It basically tells you what plants can thrive in your area. I learned this the hard way when I tried to grow peppers in a cooler zone—those guys just didn’t stand a chance!
Each region has its own set of growing conditions, so it’s crucial to look up your USDA Plant Hardiness Zone before making any purchases. You can find this info easily online and it will guide you on which seeds are likely to germinate successfully. The last thing you want is to invest time and energy in something that’s not even suited to where you live.
Another tip? Seasonal timing is key. Different seeds will thrive at different times of the year, so do your homework and figure out the best planting times. Trust me—waiting to sow till the right point can save you a lot of heartache!
Selecting High-Quality Seeds
Not all seeds are created equal. I’ve made the mistake of buying the cheapest seeds out there, only to find that they didn’t germinate or that the plants didn’t look as vibrant as those grown from a reputable source. So, always opt for seeds from trusted suppliers. There are plenty of organic and heirloom seed companies that stand behind their products, and it’s worth it!
Look for freshness dates on the seed packets. Seeds that are older might have lower germination rates, so keep an eye on that! Plus, some companies even provide a guarantee for germination rates, which gives that extra peace of mind.
And hey, if you’re feeling adventurous, consider saving seeds from your own garden plants. Not only is it cost-effective, but it also creates a living connection to your garden. Just make sure the plants are heirloom varieties if you want to replicate them next year!
Considering Your Preferences
Before you dive in, take a moment to think about what you love eating and what you have space for. If you’re not into growing tomatoes because you dislike them, why waste resources? Focus on seeds that’ll yield plants you actually enjoy consuming!
Also, think about the space you have. If you’re tiny apartment living, opting for dwarf or compact varieties could be easier. Trust me, having plants that can fit on your windowsill or a small balcony is much more manageable.
Lastly, consider disease resistance and growth habits. Some varieties are bred specifically to withstand common pests, and that’s a game changer when you’re fighting bugs or diseases! You want to have fun with this, not struggle endlessly.
Gathering Your Supplies
Seed Starting Trays & Containers
Now that you’ve picked your seeds, it’s time to secure the right containers. Don’t stress too much here; you don’t need to break the bank. I’ve used everything from recycled yogurt cups to fancy seed trays, and they all work. Just make sure they have drainage holes!
If you’re a fan of the environmentally-friendly route, consider biodegradable pots. They’re super convenient because you can just plant them directly in the ground when the seedlings are ready. No mess, no fuss!
And one last tip on containers—don’t underestimate the power of labels! Use popsicle sticks or even duct tape for labeling your seedlings. It might seem silly, but when you have a bunch of tiny plants, it’s hard to remember what’s what!
Seed Starting Mix
A good seed starting mix is crucial for the seedlings’ success. I’ve learned from experience that regular garden soil is often too heavy and damp for tiny seeds. Instead, seek out a lightweight, sterile seed starting mix that provides good drainage and aeration.
You can purchase premade mixes or even create your own! I like to mix together peat moss, vermiculite, and perlite. It’s super flexible and provides a nice environment for the seeds. Plus, it’s fun getting my hands dirty!
Make sure to moisten your mix before using it. The right moisture level can make a huge difference—too dry, and your seeds won’t germinate; too wet, and they can rot. Finding that sweet spot really helps expedite the whole process.
Growing Lights & Watering Equipment
Good lighting is key to the success of your seedlings. Natural light is fantastic, but it may not always be sufficient, especially in early spring. I found that using LED grow lights really took my indoor garden to the next level. They mimic sunlight and can be adjusted to provide the right amount of light depending on the growth stage.
Watering equipment doesn’t have to be fancy. I use a simple spray bottle to mist the soil until it’s moist. Overwatering is a common mistake among beginners, so always check the moisture level of the soil before adding more water.
Remember, it’s all about balance! Seedlings need plenty of care, but you don’t want to drown them in the process. Just keep a close eye on them, and you’ll get a good feel for how much water they need over time.
Starting the Seeds
Sowing Your Seeds
Alright, it’s finally time to plant those babies! Grab your seed trays and fill them with the prepared seed starting mix. When I first started, I was nervous about how deep to plant the seeds. A good rule of thumb is to plant them about 2 to 3 times as deep as their size. Don’t worry too much—if you mess up a little, nature usually finds a way to make it work.
After sowing, gently cover the seeds with more mix and give them a good misting. I usually put a light plastic cover over the trays to maintain humidity until I see those little green sprouts popping up! It’s like a mini greenhouse effect.
Make sure to keep an eye on them and check the seed packet for germination times. Patience is key here; some seeds may pop up in just a few days, while others could take weeks. The excitement of seeing them grow is so worth the wait!
Maintaining Proper Conditions
Temperature plays a big role in the germination phase. Most seeds prefer a warm environment, generally between 65°F to 75°F (18°C to 24°C). I use a seedling heat mat to help maintain this temperature when it’s a bit chilly, and it’s made a world of difference!
As your seeds germinate, make sure to remove the plastic cover gradually to help them acclimate to normal air levels. This step is super important to prevent them from getting “leggy,” which can happen if they’re stretching too much for light.
Don’t forget about ventilation too! Opening the windows on a nice day or having a fan pointed at your seedlings (not directly, though!) can strengthen those little stems and keep them from getting too weak.
Watering and Nutrients
Keeping your seedlings hydrated is essential, but when you’re watering, go for the lighter touch. I like to use a watering can with a fine spout to avoid washing away the seeds or disturbing the roots. Always check for moisture a couple of inches below the soil surface before adding more water.
Once your seedlings have developed a few sets of true leaves, it’s time to introduce them to some nutrients. I’ve had great success using a diluted liquid fertilizer every couple of weeks. It’s like giving them a boost of energy!
Be cautious not to over-fertilize, as that can do more harm than good. My rule of thumb is to start with half the recommended strength on the label and see how they respond before ramping it up.
Transplanting Seedlings
Timing Your Transplant
Knowing when to transplant your seedlings can be tricky. Usually, I wait until they have at least two sets of true leaves before moving them, just to ensure they’re ready for the next step. It’s like sending them off to college—you want to make sure they’re prepared for the big world outside!
Check the weather conditions as well; you want to transplant when the nights are consistently above 50°F (10°C) if you’re planting outside. If you have to transplant inside, make sure they still have adequate light and ventilation.
Be patient! Rushing this process can shock the seedlings, and we definitely don’t want them wilting and crying after all that hard work.
Preparing for the Garden
Before moving your seedlings outdoors, it’s a good idea to harden them off first. This process helps acclimate them to outdoor conditions and prevent shock. I start by taking my seedlings outside for just an hour a day and gradually increasing their time outdoors over a week or two.
During this hardening-off phase, monitor their reaction. If the leaves start to look a little crispy, I pull them back to a sheltered area for a day or two. It’s all about finding that sweet balance for your seedlings!
Once they’re ready to transplant into your garden bed or pots, think about spacing. Each plant needs a little personal space to thrive, so check the seed packet for recommended spacing before digging those holes!
Post-Transplant Care
After planting your seedlings outdoors, ensure they have enough water and mulch around them to retain moisture. I often set reminders on my phone to check on them regularly because it’s easy to forget amidst our busy lives!
Watch for any signs of distress like wilting or yellowing leaves. Sometimes all they need is a little TLC, like a watering or a gentle breeze to help them establish strong roots.
Keep an eye on pests, too. A natural insect repellent can be a lifesaver, and making sure they’re not stressed will help combat any potential issues. It’s like they’re all part of a little eco-system, and your job is to be the supportive caretaker!
Frequently Asked Questions
1. How deep should I plant my seeds?
A good rule of thumb is to plant seeds about two to three times as deep as their size. If you’re unsure, check the seed packet for specific instructions.
2. How do I know when to water my seedlings?
Check the top couple of inches of soil. If it feels dry, it’s time to give your seedlings a drink. Overwatering is a common mistake, so always check first!
3. Can I use regular soil for seed starting?
While you *can*, it’s not recommended. Regular garden soil is often too heavy for tiny seeds. It’s best to use a lightweight, sterile seed starting mix for better results.
4. What’s the best way to harden off my seedlings?
Start by taking them outside for an hour a day and gradually increase the time over one to two weeks. This helps them acclimate to outdoor conditions and prevent transplant shock.
5. When should I start my seeds indoors?
This depends on what you’re growing and your local climate, but generally, you can start seeds indoors 6-8 weeks before the last expected frost date in your area.
Related Content
- 5 composting plants promised in Montreal still not built more than a decade later as costs soar
- Boney’s Bayside Market Reducing Harmful Waste With <b>Composting</b>
- Environmental Leadership Awards Celebrate Those Who Make Orange Green
- Organic Horticulture Tips And Tricks For Your Garden
- MPCA offers $1M in grants to increase reuse and improve recycling and composting in Greater …