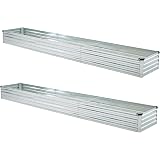


zunatu 10x2x1ft(2 Pack) Galvanized Raised Garden Bed,Outdoor Planter Box Metal Patio Kit Planting Bed for Vegetables Flowers and Succulents,Silver
$69.99 (as of 17:32 GMT -05:00 - More infoProduct prices and availability are accurate as of the date/time indicated and are subject to change. Any price and availability information displayed on [relevant Amazon Site(s), as applicable] at the time of purchase will apply to the purchase of this product.)


Gardmax 2 Pack Galvanized Raised Garden Bed, Lightweight Planter Boxes Outdoor with Easy Assembly, Large Garden Bed for Vegetables, Fruits, Flower Dark Grey
$52.99 ($26.50 / Count) (as of 14:19 GMT -05:00 - More infoProduct prices and availability are accurate as of the date/time indicated and are subject to change. Any price and availability information displayed on [relevant Amazon Site(s), as applicable] at the time of purchase will apply to the purchase of this product.)Plant Vegetation
Understanding the Benefits of Plants
One of the most effective ways to prevent soil erosion is by planting vegetation. When you think about it, plants act like natural barriers that hold onto the soil with their roots. Over time, I’ve realized that a lush landscape can dramatically slow down the process of erosion, especially in areas prone to heavy rain or wind.
In my own garden, I’ve noticed that even the smallest patches of grass or ground cover can make a difference. The roots help to bind the soil together, and I find that the beauty of the greenery is a fantastic bonus. A well-planned garden will not only look great, but it also serves a purpose in soil conservation.
If you’re unsure what to plant, opt for native species. They are often much more resilient and require less water. I’ve had great luck with a mix of shrubs and perennials that thrive in my local climate and create an impressive green barrier for my yard.
Types of Plants to Consider
When it comes to selecting plants, I’ve learned to look for those that grow deep roots. Trees and shrubs are excellent choices for large areas, while ground covers are perfect for smaller spaces. For instance, I’ve planted clover and creeping thyme which not only look delightful but also keep the soil in place.
Additionally, I’ve experimented with using cover crops, especially during off-seasons, which have worked wonders. These crops can provide protection against erosion when your main plants are not growing. Plus, they enrich the soil, and that’s a win-win in my book!
Try to incorporate a mix of perennials and annuals for year-round coverage. In my garden, I’ve made it a point to have something blooming in every season to maintain soil coverage and prevent erosion no matter what time of year it is.
Caring for Your Plants
Planting them is just the first step; I’ve learned that caring for your vegetation is equally important. Regular watering, mulching, and fertilizing can help promote healthy growth. Mulch is brilliant because it helps retain moisture, and it further protects the soil from erosive factors like wind and water.
Also, don’t underestimate the power of weeding. I make it a habit to keep my garden free from weeds that can compete with my beloved plants for nutrients and space. Trust me, it’s worth the effort when I see my plants thriving, effectively reducing erosion all around them!
Finally, consider using organic fertilizers and natural pesticides. They not only encourage healthy plant growth but also keep the surrounding soil and wildlife safe and happy. I’ve had wonderful success by keeping my gardening practices eco-friendly.
Install Erosion Control Fabrics
What Are Erosion Control Fabrics?
Okay, so in my journey to discover different erosion prevention methods, I stumbled upon erosion control fabrics. These are basically geotextiles that provide a sort of protective layer over the soil. They might sound a bit technical, but they’re incredibly useful for stabilizing soil in different landscapes.
I’ve used these fabrics in areas where I couldn’t grow plants right away, like on slopes or in newly constructed areas. They allow water to pass through but prevent soil particles from washing away. It’s like giving my soil a cozy blanket during rainstorms!
When I first started using erosion control fabrics, I was surprised at how easy they were to install. You just lay them down and secure them with stakes or pins, and voilà! It’s a hassle-free way to combat erosion until plants can take root.
Choosing the Right Type of Fabric
Not all erosion control fabrics are created equal. Through some trial and error, I found that there are different options depending on your specific needs. For instance, I learned to love biodegradable fabrics for temporary use since they naturally decompose as plants start to grow and take over.
On the flip side, I’ve also worked with synthetic fabrics in areas that needed long-term stabilization. It’s all about assessing the situation and choosing the depth and material that works best for the environment you’re working with.
When selecting your fabric, consider factors like the slope’s steepness and the type of vegetation you want to encourage. I usually seek help from specialists at local nurseries, and they’ve been a goldmine of information on what works best in our area.
Maintaining the Fabrics
Even though these fabrics are sturdy, I’ve found that regular maintenance is key. Sometimes, they can start to erode or get covered in sediment over time. I make it a point to check on them every few months to ensure they’re still doing their job.
Regularly clearing away debris that accumulates can go a long way. I find that it’s a chore worth doing to keep my erosion control measures effective. Plus, it gives me a little exercise and an excuse to be outside!
If you notice any areas where the fabric is worn or has tears, it’s essential to patch them up quickly. I keep some handy patches around, so I never lose sight of maintaining the integrity of my soil protection.
Build Retaining Walls
What are Retaining Walls?
So, let’s talk about another effective technique: retaining walls! These beauties not only add aesthetic appeal to your landscape but also serve the crucial purpose of preventing soil erosion. I’ve built a few myself, and I must say, they’re like a fortress for your soil.
Retaining walls work by holding back soil on a slope, reducing the likelihood of it washing away during rain. I particularly flip-flop between wood and stone for my projects, depending on the look I’m going for. Each has its own advantages, and I find the process of building quite fulfilling!
The best part is that they can be designed in various ways, whether you prefer a more modern look or something rustic. Generally, I think about how they can harmonize with the rest of my yard and those elements of nature around it.
Get a free subscription to PREPARE – with more gardening and homesteading tips!
How to Build Them
Building a retaining wall might seem daunting, but it’s really all about following a few basic steps. First, I always start by marking out where I want the wall to go. This way, I can visualize how it will fit into my space.
Next, digging the trench is where the real work begins. I usually go a bit deeper than the height of the wall to ensure stability. Then, I fill the trench with a compacted base material, which has been a game changer for the strength of my walls.
I also recommend stacking materials in a staggered pattern for added strength—this is crucial for durability. And don’t forget to incorporate proper drainage behind the wall to further prevent soil erosion over time. I learned this the hard way!
Maintaining Your Walls
Just like with anything else in my garden, maintaining my retaining walls is essential. After a heavy rain, I always take a moment to inspect for any shifts or damage. Keeping an eye on it can save you from bigger issues down the line.
I usually clear debris that may accumulate around the wall, as you don’t want anything causing water to pool. A little effort definitely goes a long way in preserving the wall’s integrity and effectiveness.
If you start to see cracks or anything out of the ordinary, it’s best to address them right away. Trust me, dealing with minor repairs is way easier than tackling major reconstruction later.
Practice Contour Farming
What is Contour Farming?
Ah, contour farming—this technique has really transformed the way I view farming and gardening in general. The principle behind it is pretty simple: you plant along the contours of the land rather than in rows. This helps retain water and reduce soil erosion caused by rainfall.
In my experience, contour farming has been especially useful on my sloped garden areas. By following the natural shape of the landscape, I’ve seen a remarkable reduction in soil wash and a noticeable improvement in moisture retention.
If you can visualize it, it creates a series of mini-terraces that are both functional and pretty cool to look at. You get to harness the nature of the land while it rewards you with healthy soil and crops!
How to Implement Contour Farming
To start practicing contour farming, the first step is to assess the slope of your garden. I usually create a simple outline of the contours using stakes and string. This helps me see where the natural lines of the land are, making planning much easier.
With a clear outline, I then plot my planting beds along those lines. It can take a little trial and error, but I enjoy experimenting with different plants at different angles. This flexibility allows me to see what works best for the specific area, and that’s part of the fun.
I also usually incorporate terraces for more extreme slopes. This may require some additional work, but the benefits are well worth it. My plants have thrived, and I’ve felt more connected to the rhythm of nature!
Maintaining Your Contour Farm
Even though contour farming can be quite beneficial, I find that maintenance is key. It’s essential to keep the contour lines clear of debris that can block water flow. I like to check after any heavy storms to ensure everything is still in place.
Another good practice is to rotate crops within these lines. I’ve found that alternating between different plants helps to maintain soil health and prevent nutrient depletion, which ultimately leads to better erosion resistance.
And of course, being aware of seasonal changes helps me adjust my plans accordingly. Remember, it’s all about working with nature rather than against it!
Frequently Asked Questions
What is the best method for preventing soil erosion?
The best method often depends on your specific landscape, but a combination of planting vegetation, using erosion control fabrics, building retaining walls, and practicing contour farming can be very effective.
How often should I check my erosion control measures?
I recommend checking your erosion control measures at least every few months and after heavy rainfall to ensure everything is intact and functioning well.
Can I use native plants for erosion control?
Absolutely! In fact, native plants are ideal because they are adapted to the local environment and require less maintenance while providing excellent soil stabilization benefits.
How do I maintain my retaining walls?
Regularly inspect your walls for cracks or shifts, and make sure to clear away debris around them. If you notice any issues, addressing them right away is crucial to prolong their lifespan.
Is contour farming suitable for small gardens?
Yes, even small gardens can benefit from contour farming. You can adjust the technique to suit the size and shape of your space, creating beautiful and effective planting areas!
Get a free subscription to PREPARE – with more gardening and homesteading tips!
Related Content
- Md. landfills emit much more greenhouse gas than state estimated, environmentalists find
- Tips and Tricks for a Successful Vegetable Garden
- Maplewood Township: Maplewood – South Orange Rethinking Recycling Town Hall
- Make Your First Organic Garden A Success
- Is Hydroponic Systems Right for You? Find Out Now