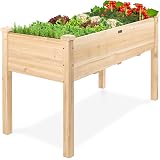


Best Choice Products 48x24x30in Raised Garden Bed, Elevated Wood Planter Box Stand for Backyard, Patio, Balcony w/Bed Liner, 200lb Capacity - Natural
18% Off


SnugNiture Galvanized Raised Garden Bed Outdoor, 2 Pcs 4x2x1ft Oval Metal Planter Box for Planting Plants Vegetables, Brown
$59.99 (as of 14:26 GMT -05:00 - More infoProduct prices and availability are accurate as of the date/time indicated and are subject to change. Any price and availability information displayed on [relevant Amazon Site(s), as applicable] at the time of purchase will apply to the purchase of this product.)Selecting the Right Plants
Identifying Strong Candidates
When it comes to cloning, finding the right plants is where the magic begins. You want to look for plants that exhibit strong health and growth. In my experience, I’ve found that plants with vibrant leaves, robust stems, and an overall zest for life are prime candidates. Whenever I’m in doubt, I inspect the parent plant closely—this really helps in spotting the best of the best.
It’s also helpful to consider the desired traits you want to replicate. Are you looking for strong blooms, edible fruits, or a specific foliage type? Knowing what you’re after helps narrow down the search. Remember, cloning is not just about multiplying, but about creating excellence!
Lastly, don’t underestimate the power of experience. Over time, I’ve learned to recognize those subtle signs of health in plants, and I trust my gut instinct. If something feels off about a plant, even if it looks fine superficially, I know I should keep looking.
Preparing Your Materials
Gathering Tools and Supplies
Before diving into cloning, you gotta get your supplies ready! You’ll need sharp scissors or a clean razor blade to take your cuttings. Trust me, a clean cut reduces the chance of disease and increases success rates. Then grab some sterile containers or pots, potting mix, and rooting hormone; these are essential in giving your new plants the best start possible.
Also, think about your environment; a humidity dome or plastic bag can create a mini greenhouse effect, which is super useful when your cuttings are rooting. I’ve also had success using basic items like clear plastic bottles as makeshift humidity domes—gotta love that DIY spirit!
Finally, don’t forget about labels! I like to keep track of what I’ve clipped, especially if I’m cloning a few different varieties. A simple marker can go a long way in keeping things organized.
Taking Cuttings
The Best Time to Cut
Timing is everything! I find that early morning is the best time for taking cuttings when the plant is fully hydrated and brimming with energy. Just like we feel fresh in the morning, plants do too! If you can, avoid taking cuttings during the hottest part of the day.
When taking your cuttings, aim for healthy stems with at least two nodes; these are points where leaves grow from the stem, and they’re critical for rooting. A cutting about 4–6 inches long is usually perfect. You want to ensure there’s enough length for the cutting to plant securely without being too long and unwieldy.
Remember to handle your cuttings with care. I’ve noticed that gentle handling can make all the difference in preventing stress on the plant tissue, which means a higher chance of successful rooting. Treat these little guys like the precious gems they are!
Rooting Your Cuttings
Creating the Right Environment
Once those cuttings are taken, it’s time to get them rooted! First off, dip the cut ends into rooting hormone; this is a game-changer for boosting growth. I’ve found that even a light coating can significantly speed up the rooting process. After that, place them in your prepared pots with damp potting mix.
Get a free subscription to PREPARE – with more gardening and homesteading tips!
I like to keep my cuttings in a humid environment right after planting—this may involve using a humidity dome or covering them with a plastic bag, as I mentioned earlier. Keeping the atmosphere humid prevents wilting and promotes root growth. Just make sure to ventilate them every now and then so they don’t roast in there!
Be patient! It can take anywhere from a couple of weeks to a month for roots to form. I check on mine regularly, but I try not to disturb them too much. A little love goes a long way, so I talk to them gently, as if they can hear me.
Transplanting and Care
Moving to Larger Pots
Once your cuttings have developed roots, it’s time to give them a new home! Transplanting them into larger pots helps themcontinue growing without getting root-bound. I gently remove each cutting, taking care not to damage the roots, and transplant them to a pot filled with quality potting mix. Make sure the new pot has proper drainage, because soggy roots can be a death sentence!
After transplanting, I continue to give them a little extra attention. Regular watering is essential during this transition phase, but don’t overdo it; you want the soil to remain moist but not soggy. It’s all about finding that sweet spot, and you’ll learn what works best as you gain more experience.
Finally, make sure they have good light but not direct scorching rays until they’re a bit more established. I place mine in a spot where they can soak up indirect sunlight while they settle into their new digs. Over time, you’ll notice them perk up—it’s so rewarding!
Frequently Asked Questions
1. How long does it take for cuttings to root?
Typically, it can take anywhere from 1 to 4 weeks for cuttings to develop roots, depending on the plant type and environmental conditions. The key is patience!
2. Can I clone any plant?
While many plants can be cloned, some are more successful than others. Herbaceous plants and many houseplants are great options, while some trees and flowering plants may be trickier to clone. Do a little research on your specific plant variety!
3. What should I do if my cutting wilts?
If your cutting starts wilting, it could be a sign of stress. Make sure it’s not too dry and check the humidity around it. You can also try misting the cutting to help it recover.
4. Is rooting hormone necessary?
While rooting hormone isn’t strictly necessary, it greatly improves the chances of success. It’s like a boost of energy for your cutting, encouraging faster and more robust root growth.
5. When should I move my cutting to a larger pot?
Move your cutting to a larger pot once you notice its roots starting to fill the pot or coming out of the drainage holes. This is a sign that it’s ready for more space to grow!