
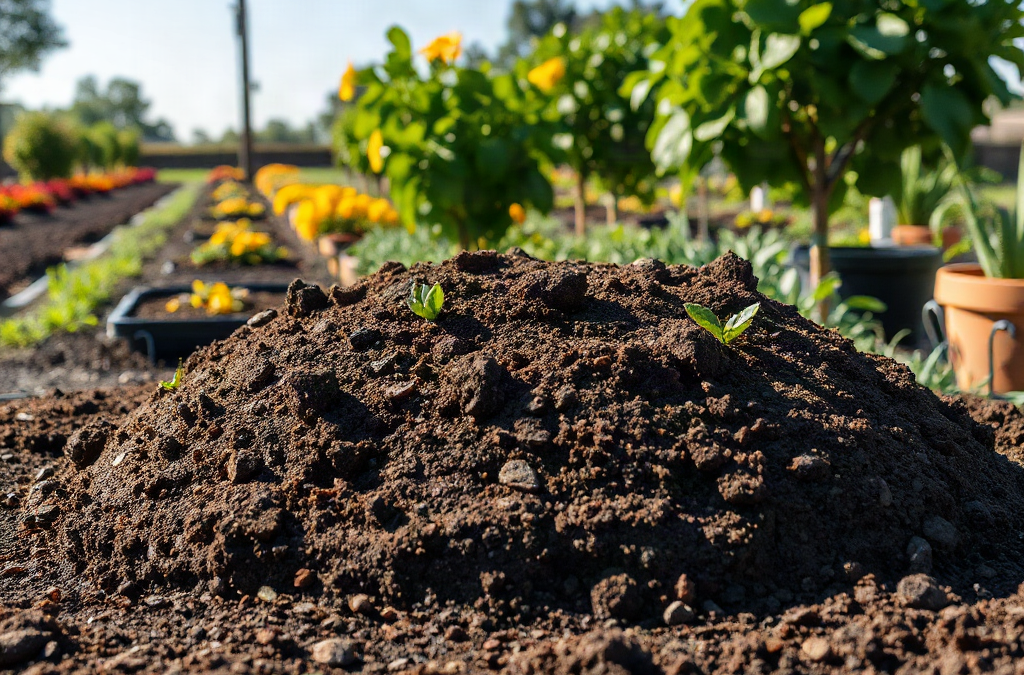
Mound gardening makes wet or compacted planting sites more usable by placing roots above saturated, oxygen-poor soil in a broad layer of amended topsoil rather than forcing them into dense ground. Build each mound wide enough to resist drying and erosion, shape a gently rounded top, and use soil that drains while retaining moisture. Avoid digging a deep bowl beneath the mound, which can collect water around the root zone. Match mound height to drainage conditions, keep mulch away from plant crowns, and monitor settling, runoff, and exposed roots during the first growing season.
Why Do Mounds Improve Wet or Compacted Soil?
A planting mound changes the position of the root zone rather than attempting to transform difficult subsoil immediately. Roots growing in the raised profile receive more air after rain because excess water can move toward the mound edges. The original ground still affects drainage, but fewer active roots are trapped in its smallest, least oxygenated pores.
Wet and compacted soils create related but distinct problems. Persistently wet soil holds water in spaces that would otherwise contain air. Compacted soil has fewer large pores through which air, water, and roots can move. A mound can reduce both pressures around newly planted roots, but it does not remove standing water from the wider site or break a buried hardpan. Water may still collect between mounds or at the boundary between imported soil and dense native soil.
Consider a shrub planted on heavy clay at the bottom of a gentle slope. A conventional planting hole can act like a basin, especially when its sides are smooth and the backfill is looser than the surrounding clay. Raising the shrub instead places much of the root ball above grade and gives early roots a broad, aerated route outward. By comparison, simply adding compost to a deep hole may create an abrupt soil boundary without correcting the incoming water from upslope.
Mounds are most useful where poor drainage is moderate, compaction is shallow, or regrading and subsurface drainage are impractical. They are less suitable in a true low point that remains flooded for long periods. In that situation, choosing plants adapted to saturated soil, redirecting surface flow where appropriate, or moving the planting area may be more dependable than building isolated humps.
Check the site after substantial rain before committing to the method. Note where water enters, how long puddles remain, and whether the soil is dense only at the surface or through a deeper layer. Digging several small inspection holes outside the intended root area can reveal changes in texture, construction debris, or a compacted layer. The common mistake is treating every wet patch as a soil-amendment problem when runoff, a leaking irrigation line, roof discharge, or surrounding grade is supplying more water than any mound can manage.
How High and Wide Should a Planting Mound Be?
Mound dimensions should respond to the plant, root-ball size, soil behavior, and duration of saturation rather than follow one fixed measurement. A shallow, broad mound is generally more stable than a narrow, steep one. Width provides usable rooting volume, moderates moisture changes, and allows a gradual transition back to the surrounding grade.
For a woody plant, the mound should extend well beyond the root ball instead of ending at its edge. Position the root flare at or slightly above the intended finished level, accounting for some settlement in newly placed soil. The sides should taper gently enough to mow, mulch, or plant without soil sliding away. A vegetable row can use a lower elongated ridge because seasonal crops have smaller root systems and the bed can be reshaped between plantings.
| Site condition | Useful mound form | Main concern to monitor |
|---|---|---|
| Surface compaction with reasonable drainage below | Low, broad mound or raised row | Drying along exposed edges |
| Heavy soil that stays wet after rain | Broader, higher profile with gradual sides | Water collecting around the base |
| Small tree or shrub root ball | Wide platform extending beyond the root ball | Settlement over the root flare |
| Seasonal vegetables | Continuous ridge or framed raised bed | Uneven irrigation and nutrient loss |
More height is not automatically better. Tall, narrow mounds lose moisture quickly, expose roots to greater temperature swings, and erode under concentrated rainfall. They can also leave a newly planted tree unstable if the root ball is perched in loose soil. In windy sites, broadening the base and using firm mineral topsoil is more useful than piling on additional height.
The finished shape should resemble a low rise integrated into the grade, not a cone surrounding a stem. Before planting, mark the proposed footprint and imagine where water will travel around it. A mound placed across a drainage path may divert runoff toward a walkway, foundation, or neighboring bed. Where several plants are planned, one continuous raised area often functions better than separate islands because it provides connected rooting space and avoids wet channels between individual mounds.
How to Build a Stable Planting Mound
A durable mound begins with surface preparation and compatible soil, not a pile of highly organic material. Remove turf and perennial weeds, then loosen only the upper surface of compacted ground where conditions permit. The goal is to create contact between layers without excavating a deep cavity that could become a reservoir.
Use mineral-based topsoil with a workable mixture of particle sizes. Compost can be blended through the upper portion in a moderate amount, but compost alone shrinks rapidly and may hold excessive water while it decomposes. Avoid building the core from wood chips, logs, fresh manure, or uncomposted yard debris. Those materials settle unevenly and can leave roots suspended or plant crowns buried.
- Map the footprint. Make the base broad enough for the mature planting area and keep runoff routes open.
- Prepare the interface. Strip vegetation and lightly roughen a sealed surface without working wet clay into slick clods.
- Add soil in shallow lifts. Spread and gently firm each layer by hand or with light foot pressure; do not compact it with heavy equipment.
- Set the plant at the finished elevation. Keep the root flare, crown, or graft area at the correct exposure for that plant.
- Shape and protect the surface. Form gradual slopes, water to settle loose pockets, and apply an appropriate mulch layer without piling it against stems.
A common failure occurs when gardeners dig a standard deep hole and then place a small mound over it. On dense clay, that buried excavation can fill from surrounding soil and keep the bottom of the root ball wet. Another mistake is placing loose soil directly over living turf. Grass can survive at the edges, compete for moisture, and create channels as buried organic matter decays.
Plant choice still matters. Species that require sharp drainage may remain unsuitable if the site receives continuous runoff or has a seasonally high water table. Conversely, plants tolerant of heavier soil may need only a modest elevation change. For a large tree, extensive grade changes over existing roots or utilities require greater caution; a qualified arborist or relevant local professional may be appropriate when excavation, drainage work, or structural roots are involved.
After construction, water the mound slowly and inspect the surface rather than assuming natural rainfall will settle it evenly. Fill isolated depressions before planting if possible. Signs of sound construction include a stable crown elevation, no visible gaps beside a root ball, and runoff spreading across the slope instead of cutting narrow channels.
How Should You Manage Water, Settling, and Erosion?
Raised soil drains sooner than the ground beneath it, so irrigation must respond to moisture inside the mound rather than to puddles nearby. Water can stand at the base while the upper root zone becomes dry. Check several inches below the surface near, but not directly against, the plant before deciding whether to irrigate.
Drip tubing or a slow hose application usually offers better control than a sprinkler that wets the slope unevenly. Apply water over a broad portion of the mound to encourage roots to spread beyond the original root ball. A small ring that repeatedly soaks only the stem area can keep roots concentrated and may wash soil away from the crown. During hot or windy weather, newly built mounds may need closer observation because their exposed sides dry faster than level soil.
Mulch reduces crusting, splash, and rapid evaporation, but its placement determines whether it helps. Maintain a thin, even layer over the mound and leave breathing room around trunks, crowns, and succulent stems. Deep mulch on a slope can slide, hide erosion, or keep the stem base damp. On a larger mound, low groundcover plants may eventually stabilize the surface, provided they do not crowd the primary plant or conceal its root flare.
Settlement is expected during the first wetting cycles, but uneven sinking signals a construction problem. Recheck the root flare or crown after heavy rain and again later in the first season. Add soil to eroded outer slopes rather than burying the plant base. If the entire mound drops substantially, loose fill, decomposing organic matter, or an unprepared turf layer may be collapsing underneath.
Watch where runoff leaves the mound. Small rills, exposed fine roots, muddy deposits at the toe, or soil splashed onto leaves indicate that water is moving too quickly. Reshape steep sections, spread flow with a broader contour, and repair bare spots promptly. If water continually ponds around the mound, the broader grade or drainage route needs attention; adding another layer on top merely increases the contrast between a dry summit and a saturated perimeter.
Long-term maintenance becomes easier once roots occupy both the mound and surrounding ground. Continue avoiding traffic, parked equipment, and repeated wheelbarrow routes over the root zone, since renewed compaction can reverse the advantage the mound created. The method is working when new growth is steady, the mound remains intact after storms, and moisture changes gradually rather than alternating between a dry crest and a flooded base.
Frequently Asked Questions
Can a planting mound fix standing water?
A mound can lift roots above temporary saturation, but it does not remove water from a low area. Persistent ponding calls for an assessment of runoff, grade, irrigation leaks, and plant suitability.
Should compost be used to build the entire mound?
No. Compost settles and changes volume as it decomposes. Use stable, mineral-based topsoil for most of the mound and blend a moderate amount of finished compost into the upper layer if needed.
Do I need to dig beneath a mound?
Deep digging is usually counterproductive on poorly drained soil because the excavation may hold water. Remove vegetation and roughen a sealed surface lightly, provided the soil is not wet enough to smear.
Can vegetables and trees use the same mound design?
Not usually. Vegetables suit renewable ridges or raised beds, while trees and shrubs need a wider, stable soil profile that protects the root flare and allows long-term root expansion.
How can I tell whether the mound is too steep?
Soil movement, mulch sliding, exposed roots, narrow runoff channels, and rapid edge drying indicate excessive slope. Widen the base and reshape the sides to create a gentler transition.
Conclusion
Successful mound construction depends more on width, soil stability, and water movement than on maximum height. Observe the site after rain, identify whether saturation comes from dense soil or incoming runoff, and avoid creating a hidden basin beneath the raised root zone. Build with mineral topsoil, integrate the mound gradually into the surrounding grade, and keep the plant’s crown or root flare exposed.
After planting, inspect moisture within the mound as well as ponding around it. Correct erosion and uneven settlement early, before roots become exposed or stems are buried by added soil. If the location remains flooded, redirects water toward structures, or cannot support a broad stable mound, choose a moisture-tolerant plant or a different site instead. The next practical step is to mark the footprint, inspect the soil profile, and trace runoff before ordering soil or plants.


